.png "How to Chase Cables into a Wall")
Chasing cables into a wall is a relatively straightforward process once you know what to do and what equipment to use. It is important to understand from the outset that if you are chasing out a wall for electrical cable, you need to comply with electrical regulations. Electrical wiring can be hazardous if completed incorrectly, so it is important to follow these guidelines as much as possible as this will keep yourself and your family safe. Here at Sunrise Tools, we provide all the equipment that you need to complete this job. Check out our guide on how to chase a wall below.
No matter the layout of your home or the cables that you are looking to install, there are a number of simple rules that have to be followed. Many of these are based on common sense, so think about the process before you start your cable chase. If you cut too deeply into your wall, it will have negative impacts on the stability of your wall and potentially the structure of your home. It is also important to consider where to place any chases in your wall in relation to the features that you want in your room – including lights, switches, sockets and appliances. It is essential to keep a note of where these chases are so that you are aware of where the cables are when it comes to hanging pictures or cutting into the wall at a later date. Please take a look at our top tips for chasing wires into your wall below.
Rule 1 – Do not make any two chases, vertical or horizontal, back to back.
Rule 2 – When cutting a vertical chase, do not cut any deeper than one third of the total wall depth to ensure stability.
Rule 3 – If you are cutting into cavity walls vertically, ensure that the cut is not deeper than a third of the thickness of the cavity skin that they are in.
Rule 4 – When cutting a horizontal chase, do not cut any deeper than one sixth of the total wall depth to ensure stability.
Rule 5 - If you are cutting into cavity walls horizontally, ensure that the cut is not deeper than a sixth of the thickness of the cavity skin that they are in.
Rule 6 – Ensure your chases are in straight lines and are made with precise cuts, using no diagonal chases.
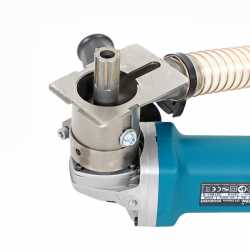
Chasing or cutting out a wall is a relatively simple process, but it does require a specific tool known as a chasing tool. Most Electricians own this tool and can complete this job for you; however, the device can also be purchased or hired if you want to undertake this project yourself. Sunrise Tools offers a variety of cutting tools that can be used in a variety of scenarios. Check them out here. If you are unsure of the tool that is right for your specific job, let us know as our expert staff can advise. Chasing tools generally have have a single blade but some may have two parallel blades. Before any cutting takes place, the blades of the chasing tool should be set to the correct depth and a hoover hose attached to the end to help reduce the amount of dust. However, do not expect this to eliminate all the dust as your room will still need to be cleaned after chasing wires into a wall.
When it comes to selecting the depth to set your chasing tool at, there are two main things to consider. Firstly, look at the depth of the wires that you want to insert into your walls. Your depth should be slightly deeper than the wires so that your wall can then be filled after you have installed your wiring. Secondly, remember the rules that are listed above – to ensure wall stability, it is important not to cut too deeply into the wall.
Before beginning to cut into the wall, it is vital to take the necessary safety precautions to reduce the chances of an accident. Protective clothing will help keep you safe; in particular, wearing protective gloves with a good grip on them and protective goggles are vital.
In order to ensure to ensure that you are cutting in a straight line, it is best to use a spirit level or tap and a pencil to make a line on your wall before beginning to cut. Remember, chase lines should be horizontal or vertical and not diagonal.
The single chase setting on your chasing tool is the most commonly used choice. Begin to follow the pencil lines that you have drawn carefully, ensuring that you stay in line. Once you have finished cutting the chase lines, you will then need to get rid of the wall in the middle. You can do this by using a hammer and bolster to pull out the centre.
There is an alternative for chasing walls built of soft construction products, such as insulation blocks (e.g. Thermalite) and aerated concrete ash blocks, by using a chasing rake the exact width of the required channel. Sunrise Tools Termite Wall Chaser Rake is a simple and safe option in such circumstances to ensure the desired width and depth of the channel is reliably achieved.
Now that you have cleared a hole in your wall by using the chasing tool, it is time to run your cables and conduit through it. It is important that your conduit is the correct width to fit securely inside the open wall. Fix the conduit in place by opening the cap and inserting it into the space provided. Once this has been installed, run the cable down the wall. Once the cables are in the correct position, the conduit cap can be closed by simply pushing down on it. The conduit is an extra layer of protection for your wall wiring.
How to Fill in A Wall Chase Effectively
Once your cables and conduit have been properly placed into your wall, it is now the time to fill the wall so that the cables cannot be seen. There are many different ways to fill up wall chases – with no one way that is better than the others – it is all down to personal preference. Our personal preference is using a mixture of sand and cement due to the depth of chases. One of the main advantages of this option is that the mixture hardens when it is set so that it feels slightly different to the rest of your wall but does not look different. This is important as any builders or future owners of your property will then be able to identify that there are wires within the wall before cutting or putting nails into them unintentionally.
The best mixture of the sand and cement is around three parts of soft sand, to one part sharp sand, and one part cement. This combination allows the mixture to dry hard but has some flexibility that makes it easier to apply. Consider painting the chase with PVA glue that is undiluted, as this allows your mixture to adhere well to the conduit holding the wiring. Fill the chase with the mortar mixture, pushing it into the space to make sure that it is well filled.
Do not worry if you have used too much mortar, as this can be easily removed. To do this and create an even surface, place a trowel on both sides of the wall, setting them over the chase and pulling them upwards to collect any extra mortar. After this step has been completed, the mortar can be left to set for around 30 minutes. At the 30-minute mark, use a pointing trowel to skim the surface by approximately 3mm. This will allow space for the plaster to be added on top of the sand and concrete mixture. The plastering stage is only important if the wall that you are chasing is visible. If you are going to apply panelling or tiles on top of the area, you do not need to add plaster as a final layer.
If you do not want to fill the chase in your wall with a sand and cement mix, patching plaster, also known as one coat plaster, is also an option to consider. This plaster is marketed to be applied in coats that can be up to 50mm thick; however, it is not particularly effective at this thickness, with the plaster eventually sagging under the weight. Therefore, if the chase that you have carved is deeper, use multiple thinner coats instead of one thick layer. It is crucial to make sure that the chase is wet if using this method, as the plaster dries out far quicker than concrete and can crack if it dries too quickly.
Whether you use concrete, then a thin layer of plaster, or plaster the whole chase, it needs to dry thoroughly before adding any decoration. Once it has dried, the chase can be painted over or covered in tiles or panelling. This ends the process.
If you are looking to access the chase again, to change or fix the wiring, a chase cutter can also help with this. The process is very similar, as once the hole has been cut, you can replace or fix any cables or conduit before refilling it and plastering over the surface.
Conclusion
Chasing out a wall for electrical cable is not the most challenging process in the world, but you do need to be prepared. It is essential to have the correct tools on hand to do the job properly, leaving your wall finished to a high standard. Sunrise Tools provide high-quality equipment to both professionals and DIY-ers alike and are here to answer any questions that you may have. When chasing your walls, it is crucial to make safety your first priority by protecting your eyes and hands from harm. Additionally, make sure that you follow our top rules listed above, as this will get your off to a great start. One final piece of advice is to ensure that you keep a note of where you have inserted wiring in your walls, as this will be helpful if you ever undertake new renovations or sell your home on to new owners – you will thank us later!


.png)